고정 헤더 영역
상세 컨텐츠
본문
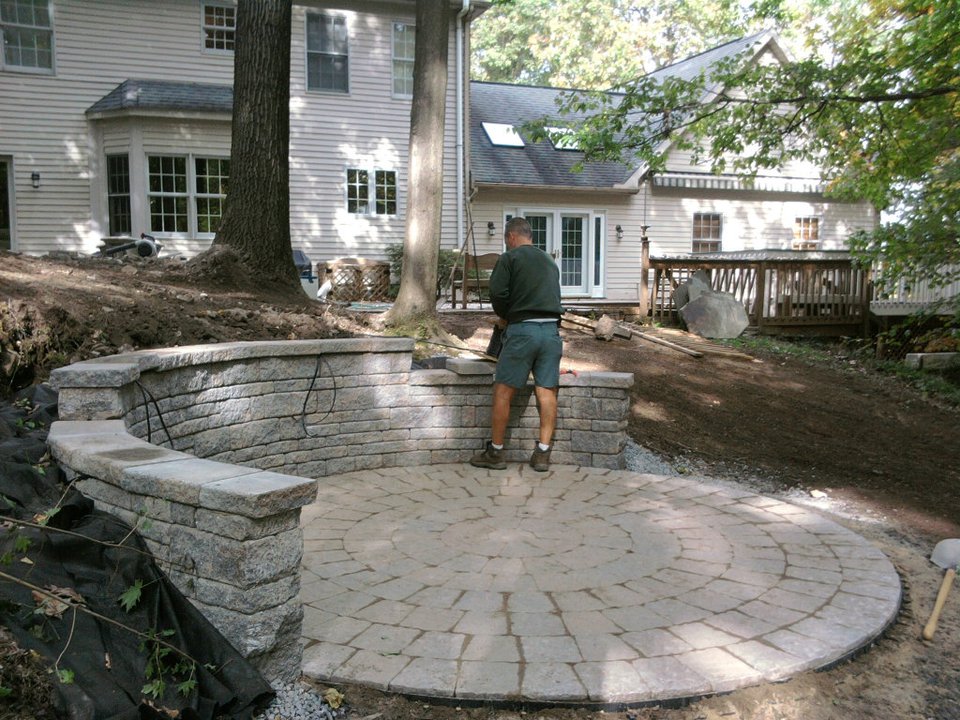
Transforming your outdoor space with do-it-yourself pavers is a rewarding and cost-effective way to enhance your home's curb appeal. In this comprehensive guide, we'll explore the benefits, steps, and tips for successfully undertaking a DIY paver project. Whether you're a seasoned DIY enthusiast or a novice, this guide will pave the way to a beautiful and functional outdoor oasis.
The Appeal of DIY Pavers
Do-it-yourself pavers have gained popularity for several reasons, offering homeowners a customizable and budget-friendly solution for creating pathways, patios, and driveways.
1. Affordability
DIY pavers can be more budget-friendly than hiring professional landscapers. With the right materials and tools, you can achieve a professional-looking result without breaking the bank.
2. Creativity and Customization
DIY projects allow for creative expression. You can choose from various paver shapes, colors, and patterns to create a unique design that complements your home's aesthetic.
Choosing the Right Pavers
1. Paver Materials
Common paver materials include concrete, brick, and natural stone. Each material has its own aesthetic and maintenance requirements. Consider the look you want to achieve and the climate in your area when selecting pavers.
2. Paver Shapes and Sizes
Pavers come in a variety of shapes and sizes, from traditional squares to hexagons and irregular shapes. The choice of shape can influence the overall design, so consider the visual impact you want to create.
Preparing Your Outdoor Space
1. Planning and Design
Before diving into the project, create a detailed plan and design for your paver installation. Measure the area, decide on the layout, and calculate the number of pavers needed. This preparation will ensure a smoother process.
2. Excavation and Grading
Prepare the ground by excavating the area and grading it to ensure proper drainage. A well-prepared base is crucial for the stability and longevity of your paver installation.
The DIY Paver Installation Process
1. Base Layer Installation
Start by laying a base layer of gravel or crushed stone. This layer provides stability and facilitates proper drainage. Compact the base to create a solid foundation for the pavers.
2. Edge Restraints
Install edge restraints along the perimeter of the project area. These restraints keep the pavers in place and prevent shifting over time. Options include plastic, metal, or concrete restraints.
3. Sand Bedding
Spread a layer of bedding sand over the compacted base. The sand allows for leveling and provides a cushioning effect for the pavers. Use a screed or leveling board to ensure an even surface.
4. Paver Installation
Carefully lay the pavers according to your design. Use a rubber mallet to tap each paver into place, ensuring they are level and aligned. Leave small gaps between pavers for jointing material.
Finishing Touches and Maintenance
1. Jointing Material
Fill the gaps between pavers with jointing sand or polymeric sand. This material stabilizes the pavers, prevents weed growth, and enhances the overall appearance.
2. Sealant (Optional)
Consider applying a sealant to protect the pavers and enhance their color. Sealants can also make cleaning and maintenance easier over time.
Real-Life Success Stories
Jack's DIY Patio Retreat
Jack, a homeowner with a passion for landscaping, transformed his backyard into a serene patio retreat using DIY pavers. His project not only added value to his property but also became a favorite gathering spot for family and friends.
Emma's Budget-Friendly Driveway Makeover
Emma, working on a tight budget, revamped her driveway using affordable concrete pavers. The DIY approach allowed her to achieve a stylish and durable driveway without the hefty price tag.
Addressing Common Concerns
Myth: Complex Installation
While the process may seem intricate, DIY paver installation is manageable with careful planning and attention to detail. Many homeowners successfully complete projects without professional assistance.
Myth: Lack of Durability
Properly installed DIY pavers can be highly durable and withstand varying weather conditions. Choosing high-quality materials and following best practices during installation contribute to longevity.
Expert Advice on DIY Pavers
John Landscapes, Professional Landscaper
"DIY paver projects can be incredibly rewarding. Take the time to plan meticulously, invest in quality materials, and follow each step carefully for a successful and visually appealing result."
Dr. Outdoor Living, Home Improvement Expert
"Creating your outdoor space with DIY pavers is a fantastic way to add value to your property. The customization options allow you to tailor the design to your taste and preferences."
Conclusion: Crafting Your Outdoor Haven
Embarking on a do-it-yourself paver project is a journey towards enhancing your outdoor space and adding a personal touch to your home. With careful planning, attention to detail, and a bit of creativity, you can pave the way to a stunning outdoor haven that reflects your style and meets your practical needs.
So, roll up your sleeves, gather your materials, and let the DIY paver journey begin. Your dream outdoor space is just a few pavers away!
'DIY' 카테고리의 다른 글
| Securing Foundations: A Comprehensive Guide to Do It Yourself Basement Wall Anchors (1) | 2024.02.18 |
|---|---|
| Paving the Way: Mastering Do It Yourself Pavers for a Stunning Outdoor Space (0) | 2024.02.18 |


